One-day BAM Workshop: Automatizing Data Management with PyBIS and the BAM Parser Infrastructure
Welcome to the one-day workshop at BAM to learn Python tools for Research Data Management (RDM) with openBIS. This page is organized into three parts (tutorials) presented during the workshop:
- Part 1 - Basic pyBIS Introduction: you will learn how to perform basic calls using pyBIS and about the available Entities in an openBIS instance.
- Part 2 - Advanced pyBIS Features: you will learn how to create new Entities, define their parent-child relationships, and automate searches and filters using pyBIS.
- Part 3 - BAM Parsers: you will learn how to automate data ingestion by creating new entities and their parent-child relationships using the BAM Parser Infrastructure.
In order to work through the tutorials, you will need to install the following on your laptop:
- Visual Studio Code (VSCode)
- Miniforge3 with Python3.12
We also recommend installing a few VSCode extensions, which will allow you to open and work with Python and Jupyter Notebooks:
- Python: https://marketplace.visualstudio.com/items?itemName=ms-python.python
- Jupyter: https://marketplace.visualstudio.com/items?itemName=ms-toolsai.jupyter
Setting up VSCode with Python in Windows
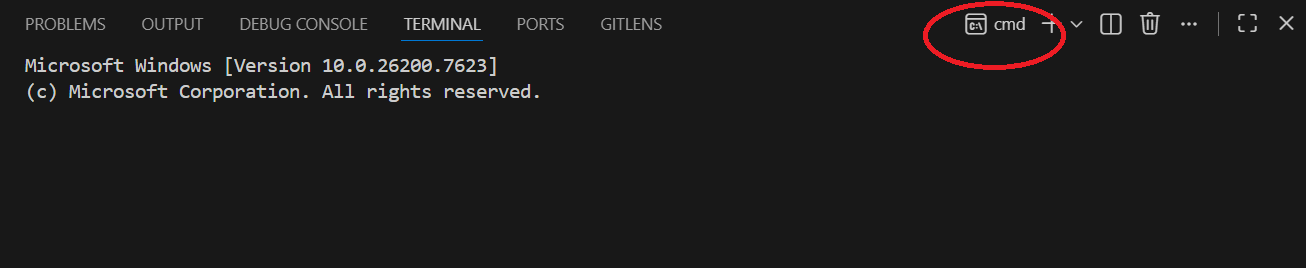
Open VSCode and open a terminal. In order to run commands with Miniforge3 and Python, you need to make sure the terminal is running with cmd. In VSCode, do:
After that, run the following command in the terminal:
Note
The path C:\Miniforge3\Scripts might be different in your case. As of January 2026, this is the default installation path for Miniforge3 on BAM laptops.
After running this command in the terminal, close VSCode completely and reopen it.
You can verify that the installation and paths are correct by running:
or
You should get back either the conda version or the path where Miniforge3 has the conda executable located.
Close VSCode completely again. When launching it once more and opening a new terminal, you should see (base) at the beginning of the terminal prompt. You can verify this by running:
Which should return base.
If everything went well, you can also launch the interactive Python terminal:
You should see something similar to:
Python 3.12.12 | packaged by conda-forge | (main, Jan 26 2026, 23:38:32) [MSC v.1944 64 bit (AMD64)] on win32
Type "help", "copyright", "credits" or "license" for more information.
Ctrl click to launch VS Code Native REPL
>>>
Set up the tutorial workspace
Now we can create a new folder in the directory where we will be working during this workshop, and then move into it:
In this folder, you can create a new conda environment (answer y when prompted) with Python 3.12:
And activate it:
Next, you will need to install a few packages:
Note
In order to speed up the process, you can also pre-install uv in your laptop and run the command above using uv, i.e.:
You can verify that the installation works by running the interactive Python terminal and importing a specific pyBIS object:
Then, in the interactive Python terminal (without the >>>), import:
If everything went well, after a few seconds you should be able to reference the Openbis class: