Versioning with GIT
A very good introduction What is version control? can be found at Atlassian who offer software and servers for Git as well but their services are not used here.
A complete book about Git is even available free of charge.
General Terms, Glossary
Project:
A folder with GIT version control, containing one or more Jupyter notebooks, Python source code files and supplementary files.Clone:
Downloading the project from the remote repository for the first time. The full history of changes will be copied as well.Commit:
The posting of marked (staged) changes including a short description, timestamp and username are added automatically. User name and email address can be stored centrally or individually for each repository.
Using TortoiseGit
Since Git is a file-level version control program, TortoiseGit adds additional context menu options for files and directories under Windows
TortoiseGit can be used independently of Jupyter(Lab) for any git repository on Windows. It integrates itself into the explorer context menu and performs file-level operations, much like the corresponding Git command line commands.
Instructions and Introductions
Online already exist numerous (video-)instructions and support, therefore we only refer to them here:
Clone - First download of an existing project
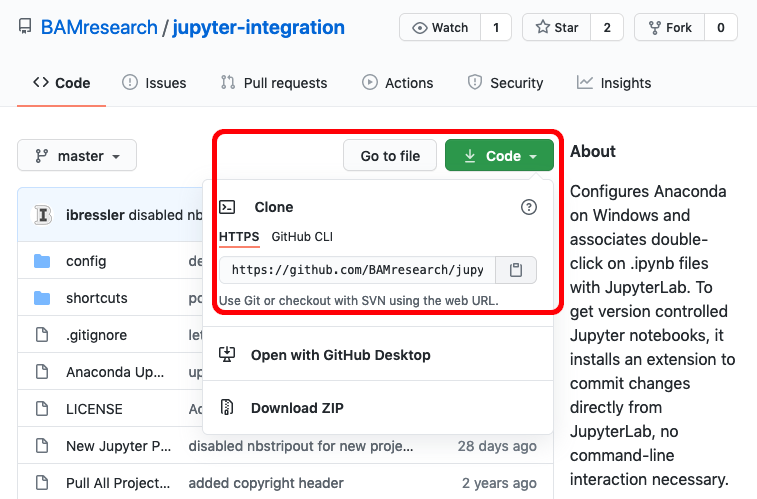
Visit the website with the git repository, e.g. a project on github.com. There click on the Code button which opens the menu with the address that can be used to clone the project (see screenshot). By clicking the
 icon next to the address, the address is copied to the clipboard.
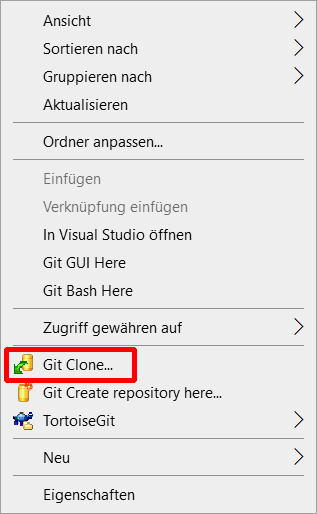 Use Windows Explorer to navigate to the row folder and right click to open the context menu and select the Git Clone… option.
Enter the HTTPS address of the project in the URL field. It should already be entered if the address has already been copied to the clipboard (previous point 2).

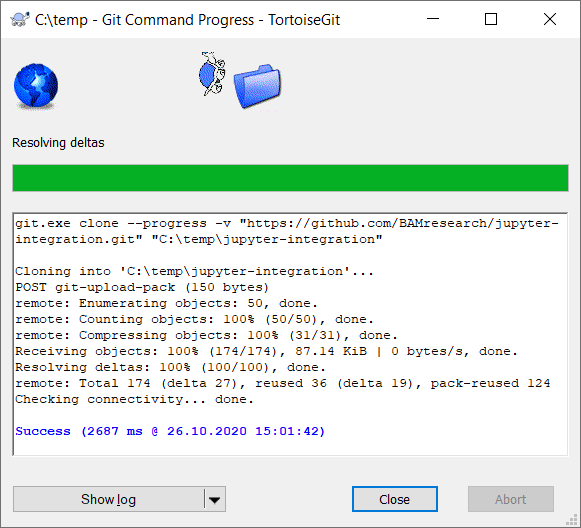 After confirming the dialog with OK, the project is downloaded and at the end a text window with status information and the message Success in blue font appears. The window can now be closed with the Close button.
Add - add files, track their changes
Right click on the file -> TortoiseGit -> select Add…. After that a window with a short overview of the selected files appears, which should be confirmed with OK. Finally a small window appears which confirms the successful adding.
The file is now marked with a blue plus symbol, i.e. it is marked for the next Commit but not yet uploaded to the server (in the so-called Staging area).
Rechts-Klick auf die Datei -> TortoiseGit -> Add… auswählen. Darauf folgend erscheint ein Fenster mit einer kurzen Übersicht der ausgewählten Dateien, die mit OK bestätigt wird. Abschließend erscheint ein kleines Fenster, welches das erfolgreiche Hinzufügen bestätigt.
Die Datei ist nun mit einem blauen Plus-Symbol markiert, d.h. sie ist für den nächsten Commit vorgemerkt aber noch nicht auf den Server geladen (im sog. Staging-Bereich).
Commit - Post changes
Open the context menu of the versioned folder (right-click) and select Git Commit -> “master”….
The first time you run it, an error occurs because the username and email address are not yet set, but both are required for each commit. Confirm here and enter and save your own name and email address.
In the following step, a window appears with a summary of the changes to be posted in the lower area and a text field for the description of these changes in the upper area. Please enter a short and meaningful description of the changes you made.
The file is now marked with a green checkmark, i.e. it is booked in the history, but still not uploaded to the server or synchronized.
Push - Update the server (first time to new project)
Select in the context menu of the folder: TortoiseGit->Push…
Leave the default settings in the following dialog and check Set upstream/track remote branch to set the current master branch as default for all further actions.
Confirm with OK.
Synchronize with the server (every other time)
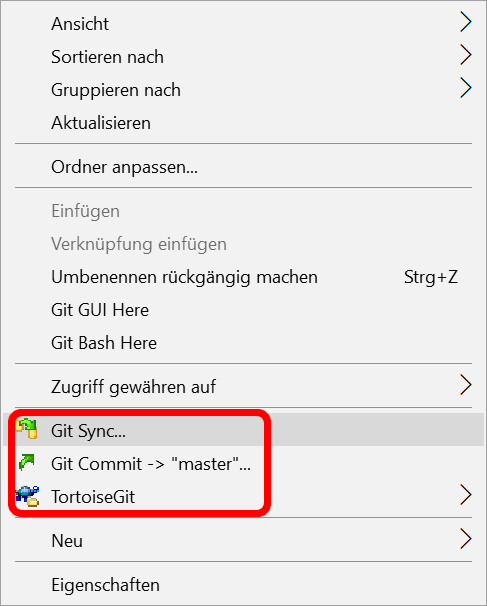
Select Git Sync… in the context menu of the folder.
First load possible changes from the server using Pull.
If this was successful, upload your changes to the server using Push.